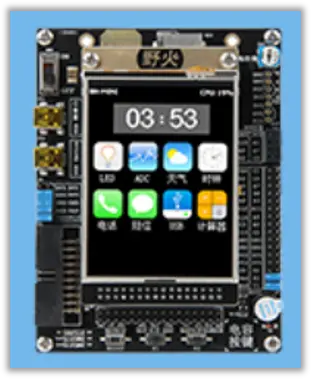
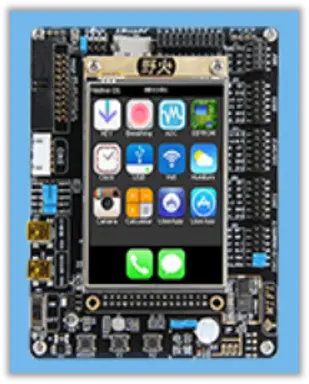
How to use 8051 development board
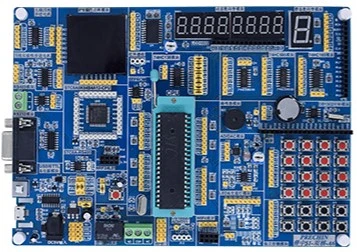
The 8051 development board can help students, enthusiasts, and product developers quickly learn to master the technology of microcontroller. It is an experimental equipment for learning the 8051 microcontroller. Here let's see how to use 8051 development board.
1. CH340 driver installation
First of all, after getting the 8051 microcontroller development board, we need to install the USB-to-serial port CH340 driver. For most computer systems, after connecting the USB cable to the computer and the USB interface of the development board, the CH340 driver will be automatically detected and installed. If your computer does not automatically install CH340 driver, it doesn't matter, we can install it manually, open the data directory "\5--Development Tools\2-Development Board CH340 Driver", as follows:
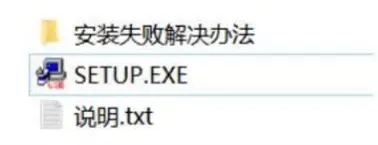
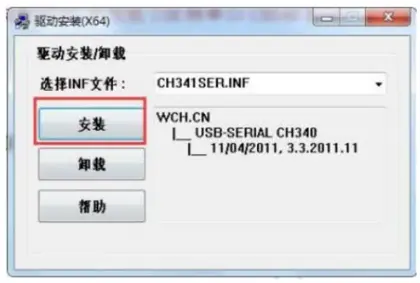
Double-click the SETUP.EXE application program, the following interface appears, click to install.
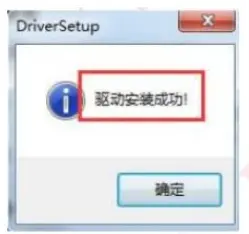
After a period of time, if the installation is successful, the following interface will be displayed: (Prerequisite: You must use a USB cable to connect the USB port of the computer to the USB port of the 8051 microcontroller development board).
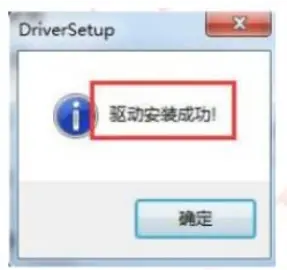
After a period of time, if the installation is successful, the following interface will be displayed: (Prerequisite: You must use a USB cable to connect the USB port of the computer to the USB port of the 8051 microcontroller development board)
Expand knowledge: Solution to CH340 driver installation failure
If a message such as "Driver pre-installation succeeded" or "Driver installation failed" is displayed, it indicates that the 8051 mini development board driver installation is unsuccessful.
At this time, you can open the development board 8051 data directory "\5--Development Tools\2-Development Board CH340 Driver\Installation Failure Solution", and install the corresponding driver. If the installation still fails, you can change another USB cable (support Android phone data cable) to install and test again; If the installation still fails, you can manually "\5--Development Tools\2-Development Board CH340 Driver\Installation Failure Solution" corresponding to the "serenum.sys" and "serial.sys" in the folder of your own system file, copy it to the C:\Windows\System32\drivers folder. If there are already these two files in the folder, and the prompt cannot be replaced, please delete the two original files first, and then copy them. Then try again to see if the driver can be installed successfully.
The above operations can generally solve the problem that the serial port cannot be installed/used. If the installation still fails, your computer system is above WIN8, you can try to turn off the digital signature of the computer, please google "how to turn off the digital signature" for the specific method. If the installation still fails, please contact us for technical consultation, and our technology will deal with it for you as soon as we see it.
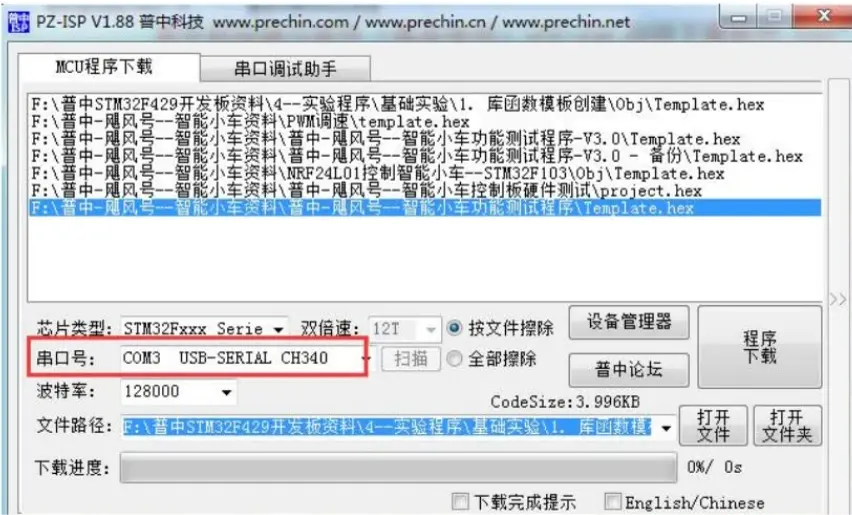
After the driver is installed successfully, you can open the 8051 mini development board data directory "\5--Development Tools\3-Program Download Software\PZ-ISP.exe" software to check whether the serial port number shows the serial port with the word "CH340“ as follows. If so, it proves that the driver installation is successful, otherwise fail.
2. 8051 development board program burning (download)
After installing the CH340 driver, we can download the program. Before downloading the program, first confirm whether the P5 terminal jumper on the USB to TTL serial port module on the 8051 development board with ISP programmer is shorted or not (that is, P31T is connected to URXD, P30R connected to UTXD), the shorting piece has been shorted by default when the 8051 microcontroller development board leaving the factory, as shown below
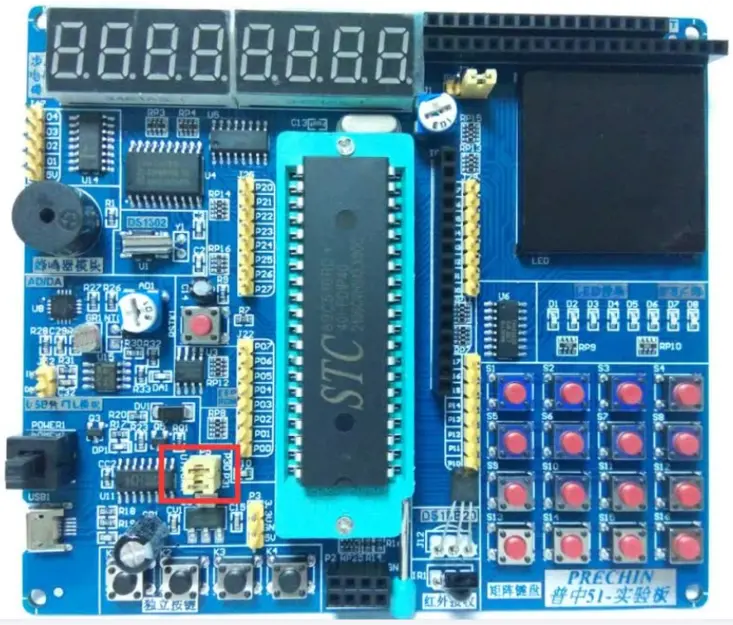
You can use the 8051 development board with USB programmer automatic download software developed by our company. The software is in the 8051 development board with programmer data directory "\5--Development Tools\3-Program Download Software". You can see that there are two programming software, one is "STC-ISP" download software , and the other is "PZ-ISP" download software. The STC-ISP download software requires a cold start, that is, click to download first and then turn on the power. The operation is more complicated, and it is not recommended to use this software. And PZ-ISP is an automatic download software. It can be downloaded with one click, and the operation is very simple. It is recommended that you use the PZ-ISP software download program. Open this software and select the corresponding 8051 microcontroller kit type to download the program. The specific operation is as follows:
1) Open "\5--Development Tools\3-Program Download Software\PZ-ISP (recommended)", as shown below
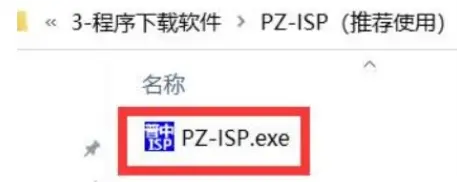
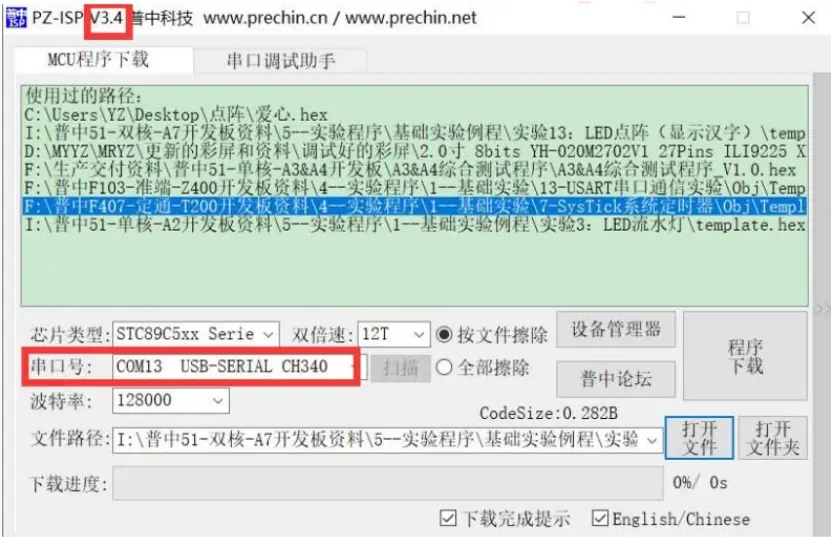
Double-click the software, and the following interface will pop up: (note the version number of the software)
(Note: You have already installed the CH340 driver by default at this time, and you can see the corresponding serial port number at this time. What we show here is "COM13USB-SERIALCH340", and your computer may not be this serial port).
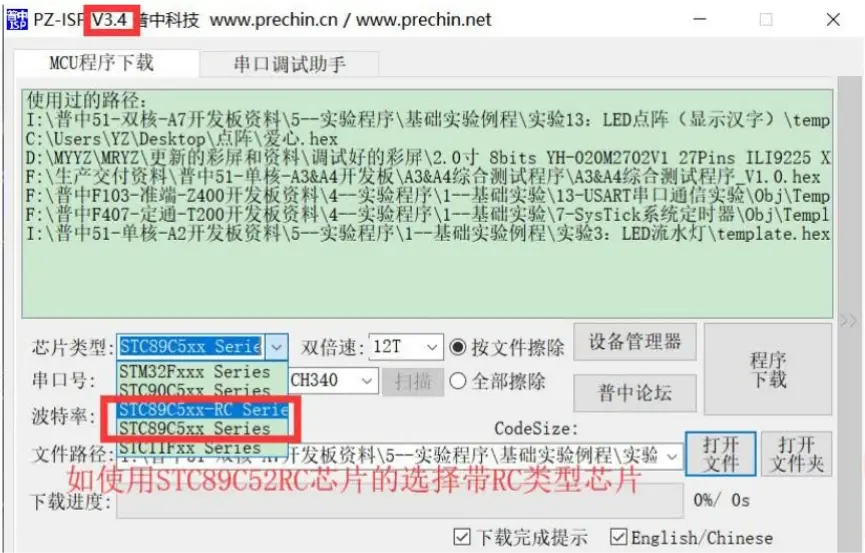
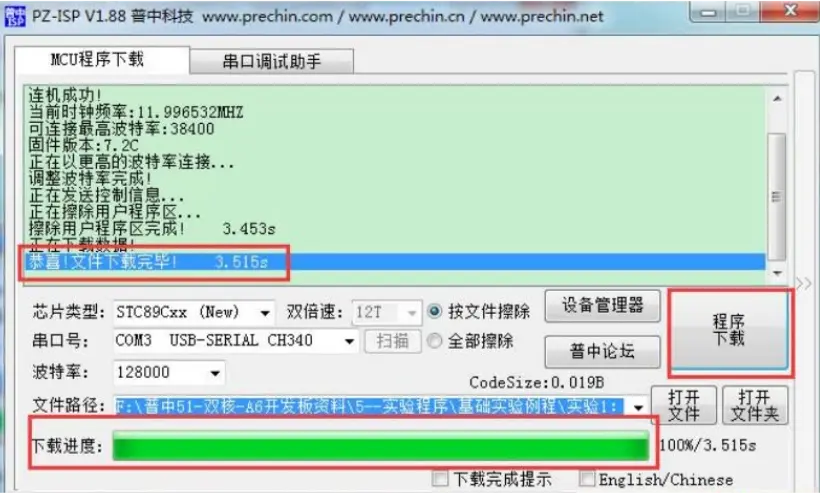
2)Select the chip type according to whether the best 8051 development board onboard chip model contains RC.
For example, if the 8051 programming board onboard chip uses STC89C52RC or STC89C52RD+ or STC89C516RC or STC89C516RD+, then select the chip type as "STC89C52xxx-RC". If using STC89C52, the chip type is "STC89C52xx". As shown below:
3)Set the 8051 programming board baud rate to "128000" (if you find that the download speed of this baud rate is relatively slow, you can increase the baud rate, if the download fails, you can lower the baud rate, in short, choose a baud rate that can be downloaded) , As shown below:
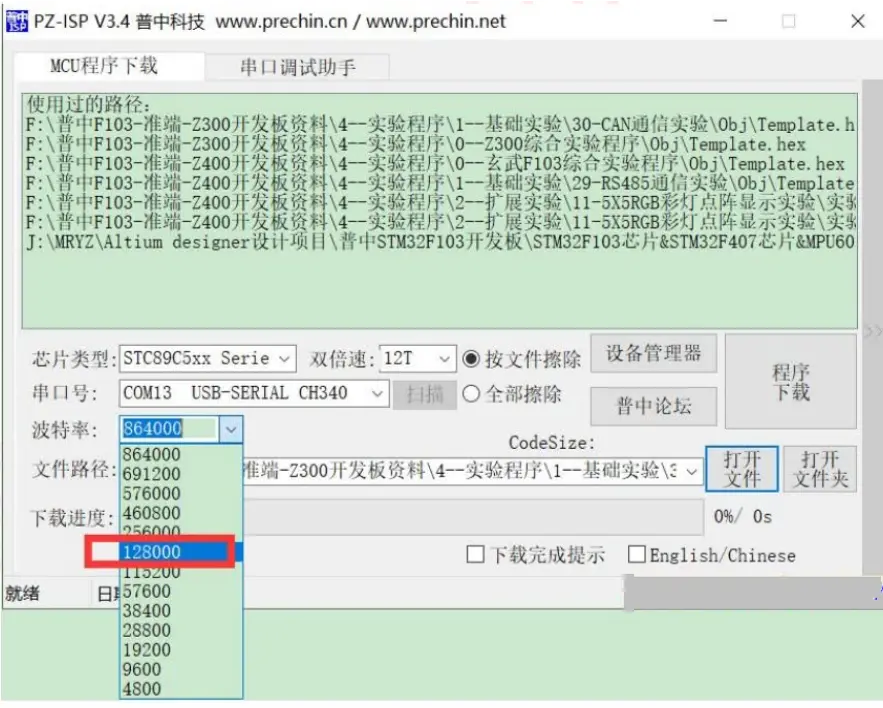
We keep the default settings for other options. Next, click "Open File", the operation is as follows:
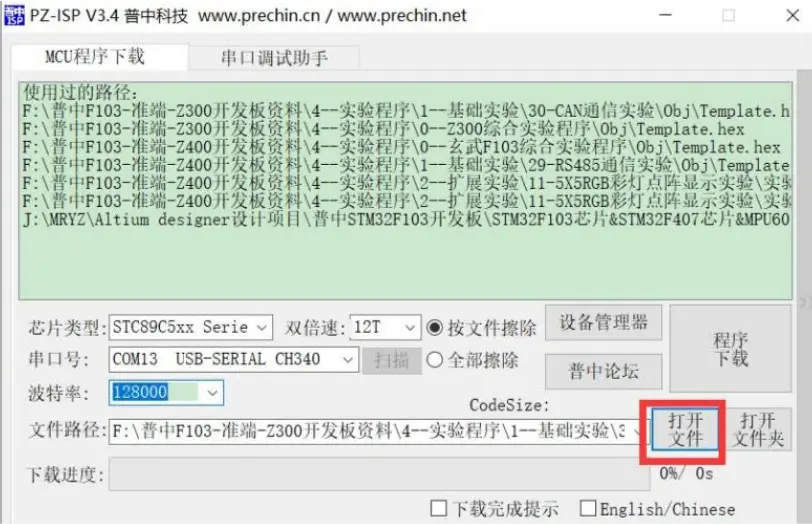
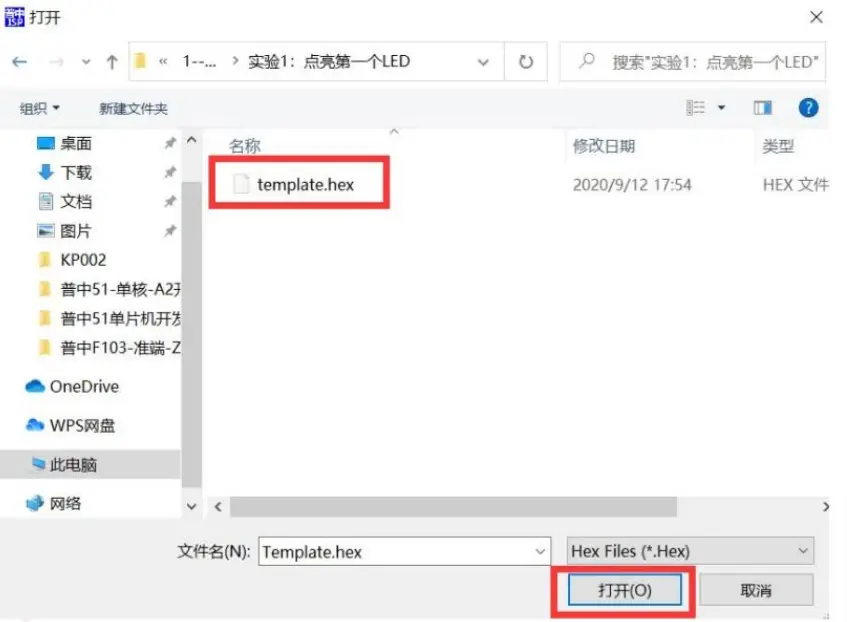
Select the .HEX file in the experimental program folder and click "Open" to select the program to be downloaded. The operation is as follows:
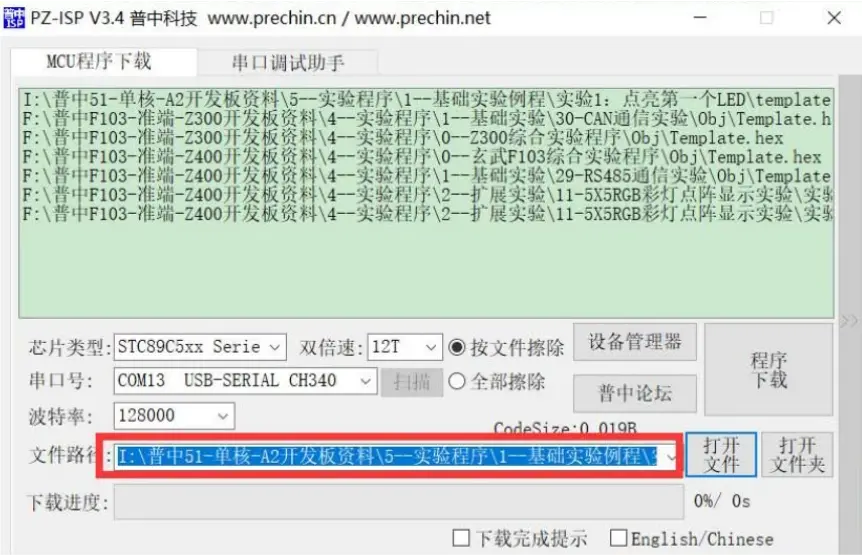
Click the "Program Download" button to complete the development board 8051 program download. When the program download is complete, it will prompt that the program download is successful. The operation is as follows:
3. 51 emulator debugging
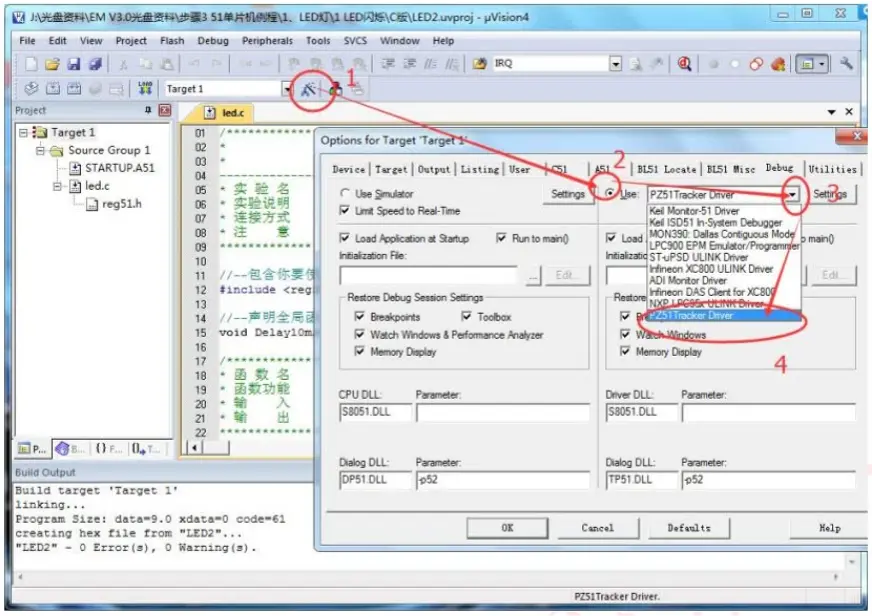
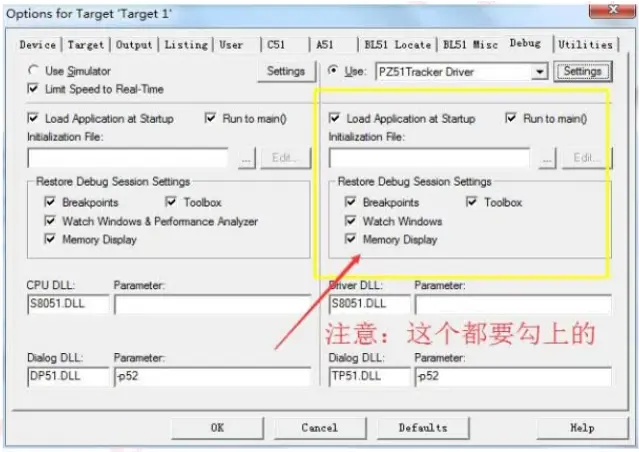
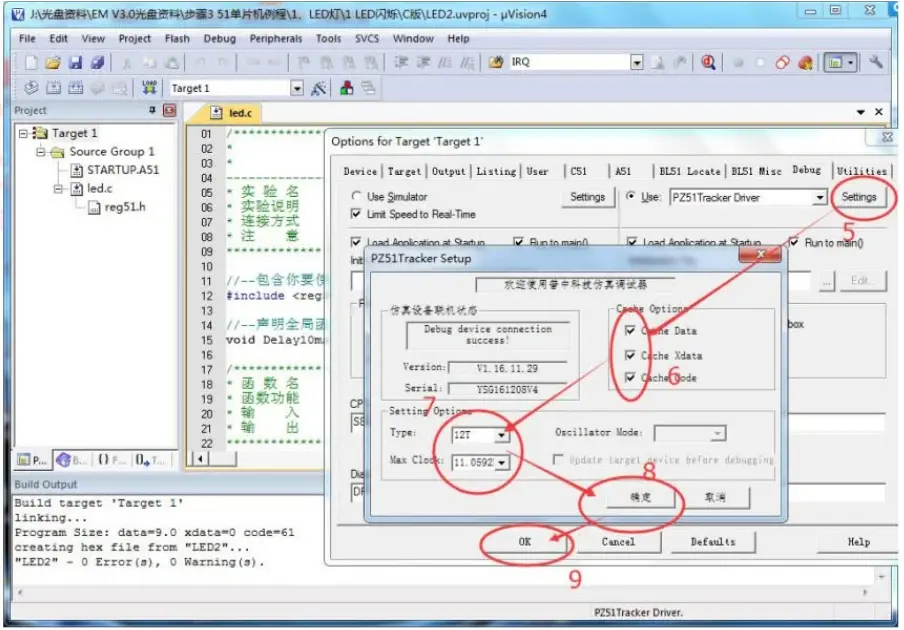
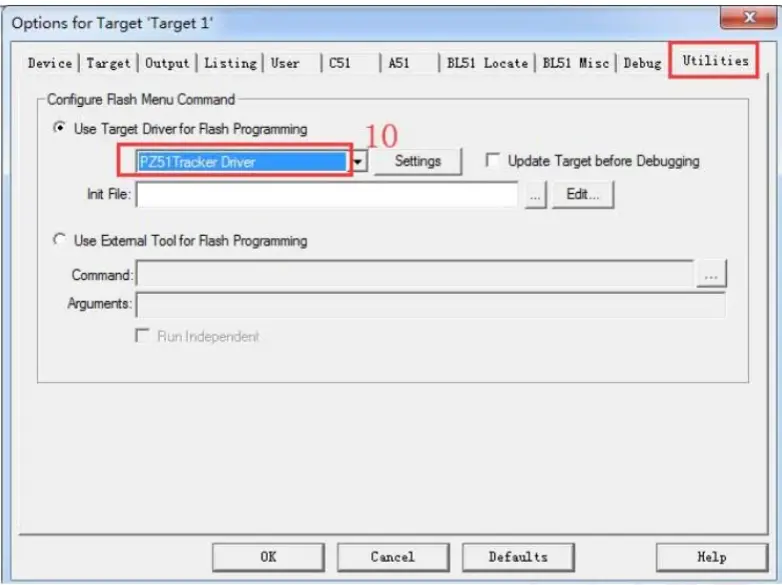
You can use the 51 emulator to insert into the 8051 microcontroller development board MCU for online debugging (the 51 emulator needs to be purchased), but it needs to be set in the KEILC51 software.
Install the driver of the emulator (please refer to the "\1--Users must see\4--Puzhong 51 emulator instructions" tutorial for driver installation.) and connect it to the computer and the development board for 8051 microcontroller.
Insert the 51 emulator directly into the 8051 microcontroller development board MCU socket. The emulator adopts a fool-proof design, and it cannot be clamped in the wrong direction. One end of the emulator is connected to the computer, and the emulator also supplies power to the 8051 programming board, so there is no need to connect the power cord when using the emulator.
The specific configuration is as follows: According to the figure below, after the steps from 1 to 10 are set, the online simulation debugging can be carried out.
4. Experimental phenomenon
After the program is successfully downloaded, the experimental phenomenon can be observed.
For example: After successfully connecting the 8051 development board to the computer with a USB cable (the computer can recognize the CH340 serial port on the 8051 development board), burn the compiled .hex file into the chip (The specific operation steps of program burning can refer to the above), download the "\4--experimental program\1--basic experiment\2-light up the first LED" experimental program, you can see the LED module D1 on the 8051 programming board the indicator lights up. Download the "\4--Experiment Program\1--Basic Experiment\3-LED Flickering Experiment" experimental program, and you can see that the LED module D1 indicator light on the development board 8051 is flickering. Download the "\4--Experiment Program\1--Basic Experiment\4-LED Water Light Experiment" experiment program, and you can see the LED module D1-D8 indicators on the 8051 development board circulate water from left to right.
The 8051 development board code of each experiment will not be introduced in detail here, you can check it in our 8051 development board tutorial, or contact us to get it.
In the article “Best 8051 Development Board“, we have some basic 8051 microcontroller development board description, such as what is 8051 development board, 8051 microcontroller development board datasheet, 8051 development board features, 8051 microcontroller development board PCB layout, 8051 development board schematic, and we introduced the 8051 development board function of each module and components, and how to make 8051 development board etc., You can also click to view to see more about the 8051 development board.
● Buy 8051 development board
Some users want to know the 8051 microcontroller development board price, but they don’t know where to buy 8051 development board. In fact, you can do 8051 development board buy online. After communicating with the seller about the specific development board requirements, you can get the 8051 development board price you want. For example, you can get 8051 development board price in Pakistan, 8051 microcontroller development board price in India and so on.
You can view our homepage to see more development board models and click WHATSAPP to contact us for more details, and obtain the price of the development board.
● Related knowledge
What is 8051 microcontroller
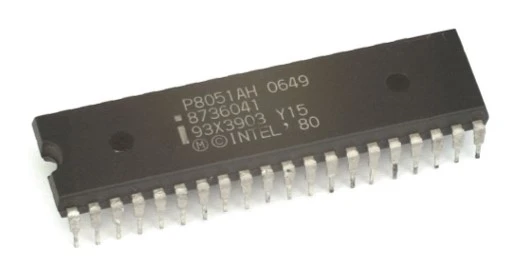
The 8051 microcontroller is an eight-bit single-chip microcomputer launched by Intel in 1981. It comes in a 40-pin DIP (dual in-line package). It has 4kb of ROM (on-chip programmable space) and 128 bytes of built-in RAM space, and can be connected with 64KB of external memory with the microcontroller if needed. There are four parallel 8-bit ports which are easy to program and address. An on-chip crystal oscillator is integrated in the microcontroller, and the crystal frequency is 12MHz. In the microcontroller there is a serial input/output port with 2 pins. There are also two 16-bit timers integrated inside; these timers can be used as both internal function timers and external function counters. The microcontroller is made up of 5 interrupt sources, namely serial port interrupt, timer interrupt.
How many bit is 8051 microcontroller
8 bits.
Why 8051 is called 8 bit microcontroller
The data bus (internal and external) of the 8051 microcontroller is 8 bits wide. The number of bits of the computer is determined by the number of bits of the data bus, so the 8051 microcontroller is called an 8-bit microcontroller.
History of 8051 microcontroller
The 8051 microcontroller is an eight-bit single-chip microcomputer launched by Intel in 1981, also known as the Intel MCS-51 architecture microcontroller. It was developed by Intel in 1980. Later, Intel sold the 51-core design to several big companies. Electronic design manufacturers, such as SST, Philip, Atmel and other large companies, so there are all kinds of microcontroller with 51 cores on the market. Although Intel 8051 microcontroller were discontinued in 2007, there are still more than 20 Semiconductor manufacturers are still producing 8051-compatible microcontrollers, processors based on the MSC-51 architecture. These microcontrollers are compatible with 51 instructions, and expand some functions on the basis of 51, while the internal structure is consistent with 51.
8051 microcontroller has many functions, such as: serial communication, timer, interrupt, etc., so many students and beginners start to use 8051 microcontroller to study the concept of MCU. It is the best way to start learning microcontroller, embedded system and programming (including C and Assembly language) is one of the best platforms. Even though many advanced and advanced microcontrollers were developed, 8051 microcontrollers are still used in many embedded systems and applications and are still very popular
8051 microcontroller applications
Consumer appliances (TV tuners, remote controls, computers, sewing machines, etc.);
Home applications (TVs, VCRs, video games, camcorders, musical instruments, home security systems, garage door openers, etc.);
Communication systems (mobile phones, walkie-talkies, answering machines, paging equipment, etc.);
Office equipment (fax machines, printers, copiers, laser printers, etc.);
Automotive (airbags, ABS, engine control, transmission control, temperature control, keyless entry, etc.);
Aerospace;
medical equipment;
defense system;
robot technology;
Industrial process and flow control;
radio and network equipment;
remote sensing.


